CLOUD
01-Oct-202522-Oct-2025
Quick Start Guide for Cloud VPN
Interspace provides comprehensive tools for managing your Cloud VPN service through an intuitive web-based control panel. To access these tools, log in to the My Interspace control panel and select the Cloud VPN service from the home page.Configuration begins with setting up a VPN gateway, which serves as a central node in the Cloud infrastructure. It accepts incoming VPN connections from multiple endpoints and establishes a secure private network that connects all authorized devices together.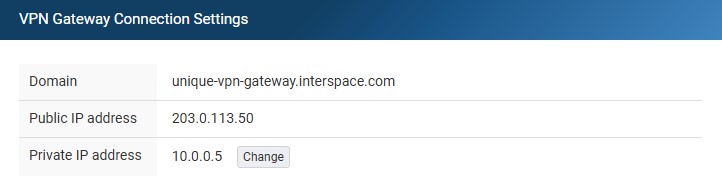
1.Configure the VPN Gateway
The Cloud VPN service comes pre-configured with all the basic settings. It includes a dedicated public IPv4 address, a unique public domain, and an official SSL certificate that renews automatically.To establish VPN connections from your remote devices, whether they are VPN routers or VPN clients installed on computers, configure them to connect to the VPN gateway domain. You can find this domain in the VPN Gateway tab of the Cloud VPN service in My Interspace. You must use the domain instead of the IP address because the SSL certificate validation process requires the domain to establish a secure connection.For the examples in this guide, we will use the domain unique-vpn-gateway.interspace.com. Your actual domain will be different and unique to your service.Beyond the preconfigured default settings, the only option you can modify is choosing a private IP address for the VPN gateway. This is an optional step that enables secure communication between VPN-connected remote devices and your Cloud servers. By assigning this IP, you automatically join the entire private subnet to the VPN, making all Cloud servers with private IP addresses in that subnet accessible to remote devices connected via VPN.2.Configure VPN users for computer and smartphone connections
A VPN user is an account that allows direct access to the VPN network from VPN client software installed on computers or smartphones. A VPN client is an application that establishes a secure connection to a VPN gateway and creates an encrypted tunnel for all network traffic. Once connected, users can access resources in remote locations connected through VPN routers, as well as Cloud servers using their private IP addresses.To create VPN user accounts, open the VPN Users tab of the Cloud VPN service in the control panel. This page contains two main sections: IP ranges and user accounts.IP ranges define ranges of IP addresses that are automatically assigned to VPN clients that connect. The system assigns addresses from the IP range when users connect. Before you can create VPN users, you must configure at least one IP range. To create an IP range, click the Add button in the IP ranges section, then specify the first and last IP addresses for the range.To create a VPN user account, click the Add button in the VPN users section. In the configuration window, select an IP range from the drop-down menu and set a username and password for the user account.After creating the user account, configure the VPN client on your computer or smartphone. Open the built-in VPN client or install a compatible third-party client, then enter the username and password you configured. In the server field, enter the domain of your VPN gateway, for example unique-vpn-gateway.interspace.com. Once a successful connection is established, you can monitor active connections under the Monitoring tab of the Cloud VPN service in the My Interspace control panel.For more details, see the Complete Guide to Configuring VPN Users for Computer and Smartphone Connections.3.Configure VPN Routers for Site Connections
A VPN router is a network device that connects an entire site or location to a VPN network. These routers can be deployed in headquarters, branch offices, retail locations, and other facilities.A VPN router allows all computers and devices on private networks at that site to communicate securely with other connected sites and your servers in the Interspace Cloud.To create a VPN router connection, open the VPN Routers tab of the Cloud VPN service in the control panel. This page displays all configured routers with their identity, subnets, and connection details.To add a new router, click the Add button. In the configuration window, configure the Router identity to match the local IPsec/IKEv2 identity of your physical router, enter the private network ranges of your site in the IPv4 Subnets field using CIDR notation, and set a strong Pre-shared key.After creating the router profile in the control panel, configure your physical router device to connect to the VPN gateway using the unique-vpn-gateway.interspace.com domain, along with the router identity and pre-shared key you configured. Once the connection is established, you can monitor its status under the Monitoring tab.For more details, see the Complete Guide to Configuring VPN Routers for Site Connections.4.Configure Cloud Servers to Join the VPN Network
Servers in Interspace Cloud can communicate with each other using private IP addresses over the Cloud Private Network, without using the Internet. You can create multiple private subnets in the cloud private network to organize your servers into different network groups.When you assign a private IP address to the VPN gateway from a specific private IP subnet, all servers in that subnet automatically become part of the VPN network. This means that remote devices connected via VPN clients or VPN routers can access these servers directly using their private IP addresses. For example, if your VPN gateway is assigned the IP address 10.0.0.5, all servers in the 10.0.0.0/24 subnet become available to devices connected to the VPN. There is no need for additional configuration of the servers themselves - they join the VPN automatically based on their membership in the subnet.Related content
Documentation

Cloud

Communications

Hosting

My Interspace
Tech Articles

Tutorials

Learn
News

Latest news

Latest events
Related products

Cloud VPN
Cloud VPN creates a secure virtual private network that enables encrypted communication between LAN networks at physical sites, individual computers/smartphones and virtual servers in Interspace Cloud.
It is perfectly suited for banks, software developers, CRM/ERP service providers, healthcare organizations, legal firms, accounting firms, e-commerce businesses and globally dispersed teams.

Elastic Cloud VPS
Elastic Cloud VPS is a virtual machine running on advanced cloud and networking technologies, offering superior advantages over traditional VPS hosting at an exceptional price-to-performance ratio.
Deploy OS and apps in just 1 min. One-click geo-redundant backups, snapshots and disaster recovery. Next-generation AMD EPYC processors, ultra-fast NVMe storage, dedicated connections and free private networking.

Load Balancer
The Load Balancer distributes traffic to multiple servers in your private network, ensuring high performance and redundancy. Designed for high availability and large numbers of connections.
It offers advanced features, including free automatic SSL certificates, automatic failover, session persistence, connection multiplexing, WebSocket, per-IP rate limiting and more.

Cloud NАТ Gateway
Inbound and outbound connections over the Internet, for your virtual servers that have only private IP addresses.
The servers access the Internet by routing the traffic through the NAT gateway. Optionally, they can receive inbound connections from the Internet using the port forwarding feature.
 English
 Deutsch
 Македонски
 Shqip
Shqip Slovenščina
 Srpski
 Български